Flat Calibration frames.
Learning how to take flat frames is an essential step for any deep-sky astrophotography enthusiast.
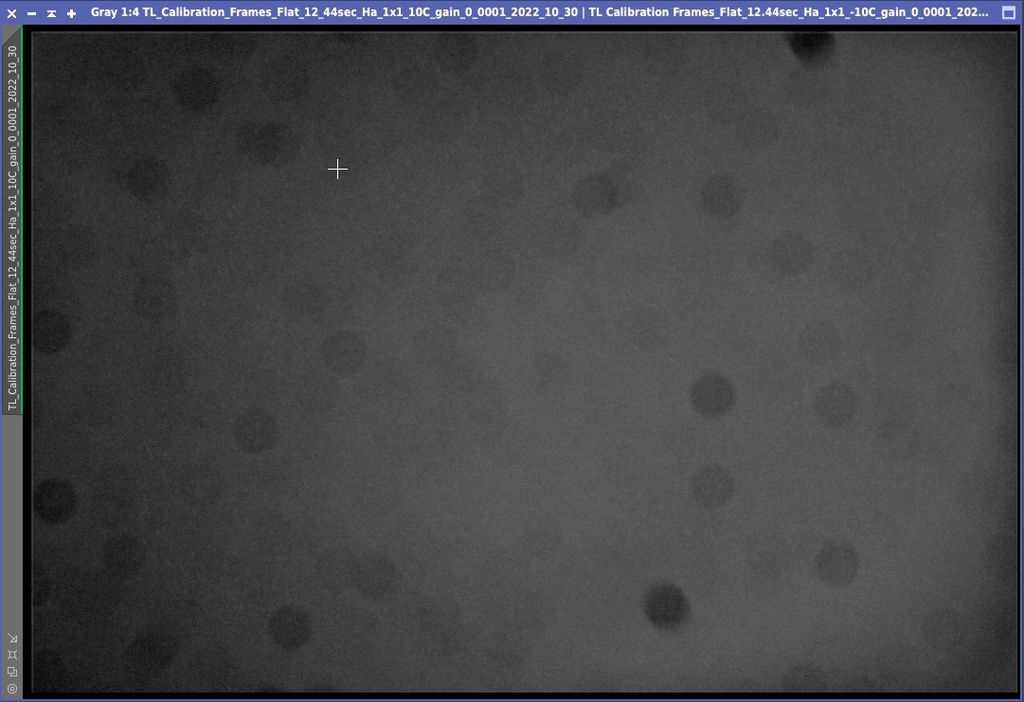
In astrophotography, a flat calibration frame, commonly referred to as a “flat,” is an image used to correct for uneven illumination and imperfections in the optical path of a camera setup, such as vignetting, dust motes, and other artifacts. It captures the response of the camera sensor to a uniformly illuminated field, allowing photographers to calibrate their. final images.
Key Purposes of Flat Calibration Frames:
1. Correcting Vignetting: Vignetting occurs when the edges of an image are darker than the center, often due to the shape and design of the lens or telescope. A flat frame captures this uneven illumination, enabling the correction of vignetting in the final image.
2. Dust and Sensor Artifacts: Dust particles on the sensor or optical elements can cast shadows or leave other marks on images. Flat frames help identify and remove these imperfections by providing a reference for the dark or bright spots caused by dust or defects.
3. Evening Out Sensor Response: Camera sensors may not have a uniform response across the entire surface. Flat frames help correct for these inconsistencies, ensuring that each pixel’s response is normalized in the final image.
How to Capture Flat Frames:
1. Uniform Illumination: The key to a good flat frame is uniform illumination across the field of view. This can be achieved using a lightbox such as our FlatMaster 150 or 250.
2. Same Optical Path: It’s crucial to take flat frames with the exact optical setup used for capturing the main images (lights). This includes maintaining the same focus, filter, and aperture (if you use a camera lens).
3. Short Exposure Times: Flat frames should ideally be exposed such that the histogram peak is roughly at the middle of the range, avoiding both underexposure and saturation. This is often achieved with short exposure times (usually from 2 seconds – 5 seconds).

Using PegasusAstro FlatMaster and N.I.N.A.
N.I.N.A. imaging software offers an automated method for capturing flat frames (Flat Wizard), which can be easily integrated with the Pegasus FlatMaster 150 or FlatMaster 250. However, there are key steps in the automated configuration that require careful attention. Incorrect selection of the driver or settings in NINA can result in line banding and inaccurate calibration flat frames.
Howto Steps
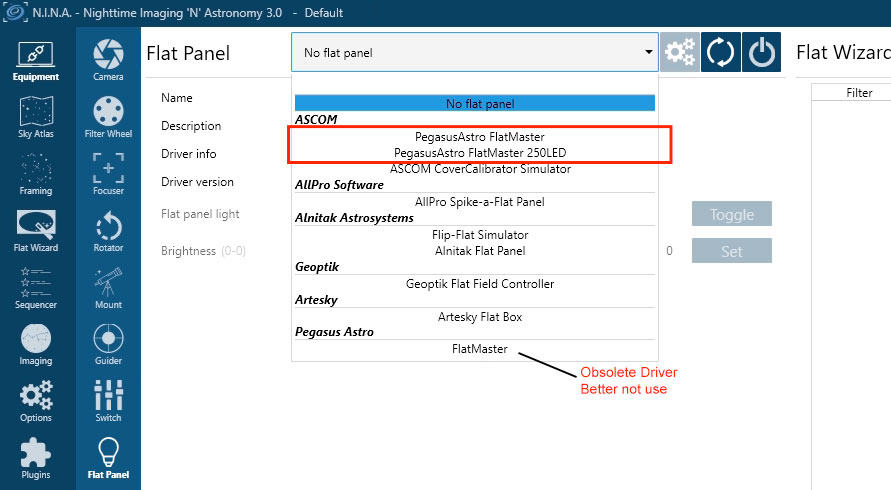
- Select the ASCOM “Pegasus Astro – FlatMaster 150 or Flatmaster 250LED.
Please be aware that while NINA includes a native FlatMaster driver, we do not recommend using it. This driver is now obsolete and does not fully support our latest FlatMaster devices. Specifically, it does not allow you to dim the FlatMaster to the lowest brightness setting.

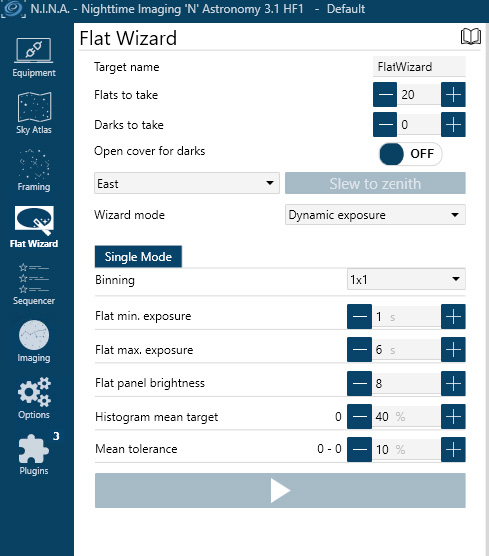
Go to NINA’s Flat Wizard.
- Select Dynamic Exposure. This setting will automatically adjust the brightness of the flat panel in order to achieve the optimal brightness for your flat calibration frames
- Set Flat min. exposure to 1 second. You do not need shorter exposures even if you have a very fast system like an f/3 telescope. Very short exposures (less than half second) might cause band lines in your flat fields.
- Set Flat max. exposure to 6 seconds. Here you can increase the maximum exposure to e.g. 10 seconds if you use narrowband filters.
- Set flat panel brightness to 8 as a starting point. If your optical system is slow (requires longer exposure times), you can increase the brightness to reduce the exposure time needed.
- Set Histogram mean target to 40%. In a 16bit camera this is close to 26.000 ADU.
- Set Mean tolerance to 10%

Click the play button and start capturing flat frames.

